Laminate flooring is known for being a great project for homeowners that love to work on home improvement projects themselves. Therefore, if you are a person who can pay attention to detail, follow instructions, and find a buddy to help you; you will be able to install laminate flooring by yourself- well, almost by yourself. Everybody needs assistance when it comes to measuring properly and making proper cuts. The process of installing laminate flooring can be very tedious, but it can be done by the amateur.
The basic knowledge of how to use a tape measure~ which includes laying it out and reading the numbers is required. If you do not know how to do this, simply round up a friend that has the knowledge on how to do this. It also helps to have a buddy around, as cartons of laminate flooring can be very heavy. It is of the utmost importance that you treat each carton like “gold.” Nobody wants to find a broken carton, due to poor handling.
It also helps to read the handy, dandy installation guide that comes in your laminate flooring carton. In this information, you should find information regarding the necessary tools, proper underlayment, transitions, moldings, and glue that you may need before you even begin installing your laminate flooring. By being informed and educated, you really can install laminate flooring by yourself.
To start you will need basic tools and supplies:
Tools:
Measuring tape
Pencil
Goggles
Jig saw to cut laminate(with upside down, medium teeth)
Undercutting Saw to undercut door jambs (vibratory undercut saw)
Installation Kit (optional)
Spacers
Supplies:
Laminate flooring
Proper underlayment
Moldings and transition pieces
One of the simplest, but easiest ways to get a good idea of how to lay your laminate flooring is to read the instruction. Many people never open the installation instructions that come with the product. Put yourself in an elite group, read instruction! You will not regret it!
Assuming you have chosen your floor already, open the boxes and allow them to come to room temperature by letting them adjust for at least 48 hours. The room temperature should be 60 degree minimum. When the boxes are stacked, cross stack them. This will eliminate any potential warping or bending of the laminate planks.
While your floor is acclimating, you must remove all the moldings, baseboards, or heat registers on the floor that would interfere with the installation. If you decided to keep your wall base intact, right after laminate floor installation simply cover the expansion gap with a quarter round molding.
If the room is currently carpeted, the carpet, underpad, tack strips, and tacks must be removed. Make sure the floor is all clear, and if any floorboards are loose- nail them in, so you don’t have to deal with squeaky floors.
Make sure the subfloor is dry, level and in good shape. Make sure any lose debris or dirt is removed before the foam underlayment is placed down. Again, read the manufacturers instructions.
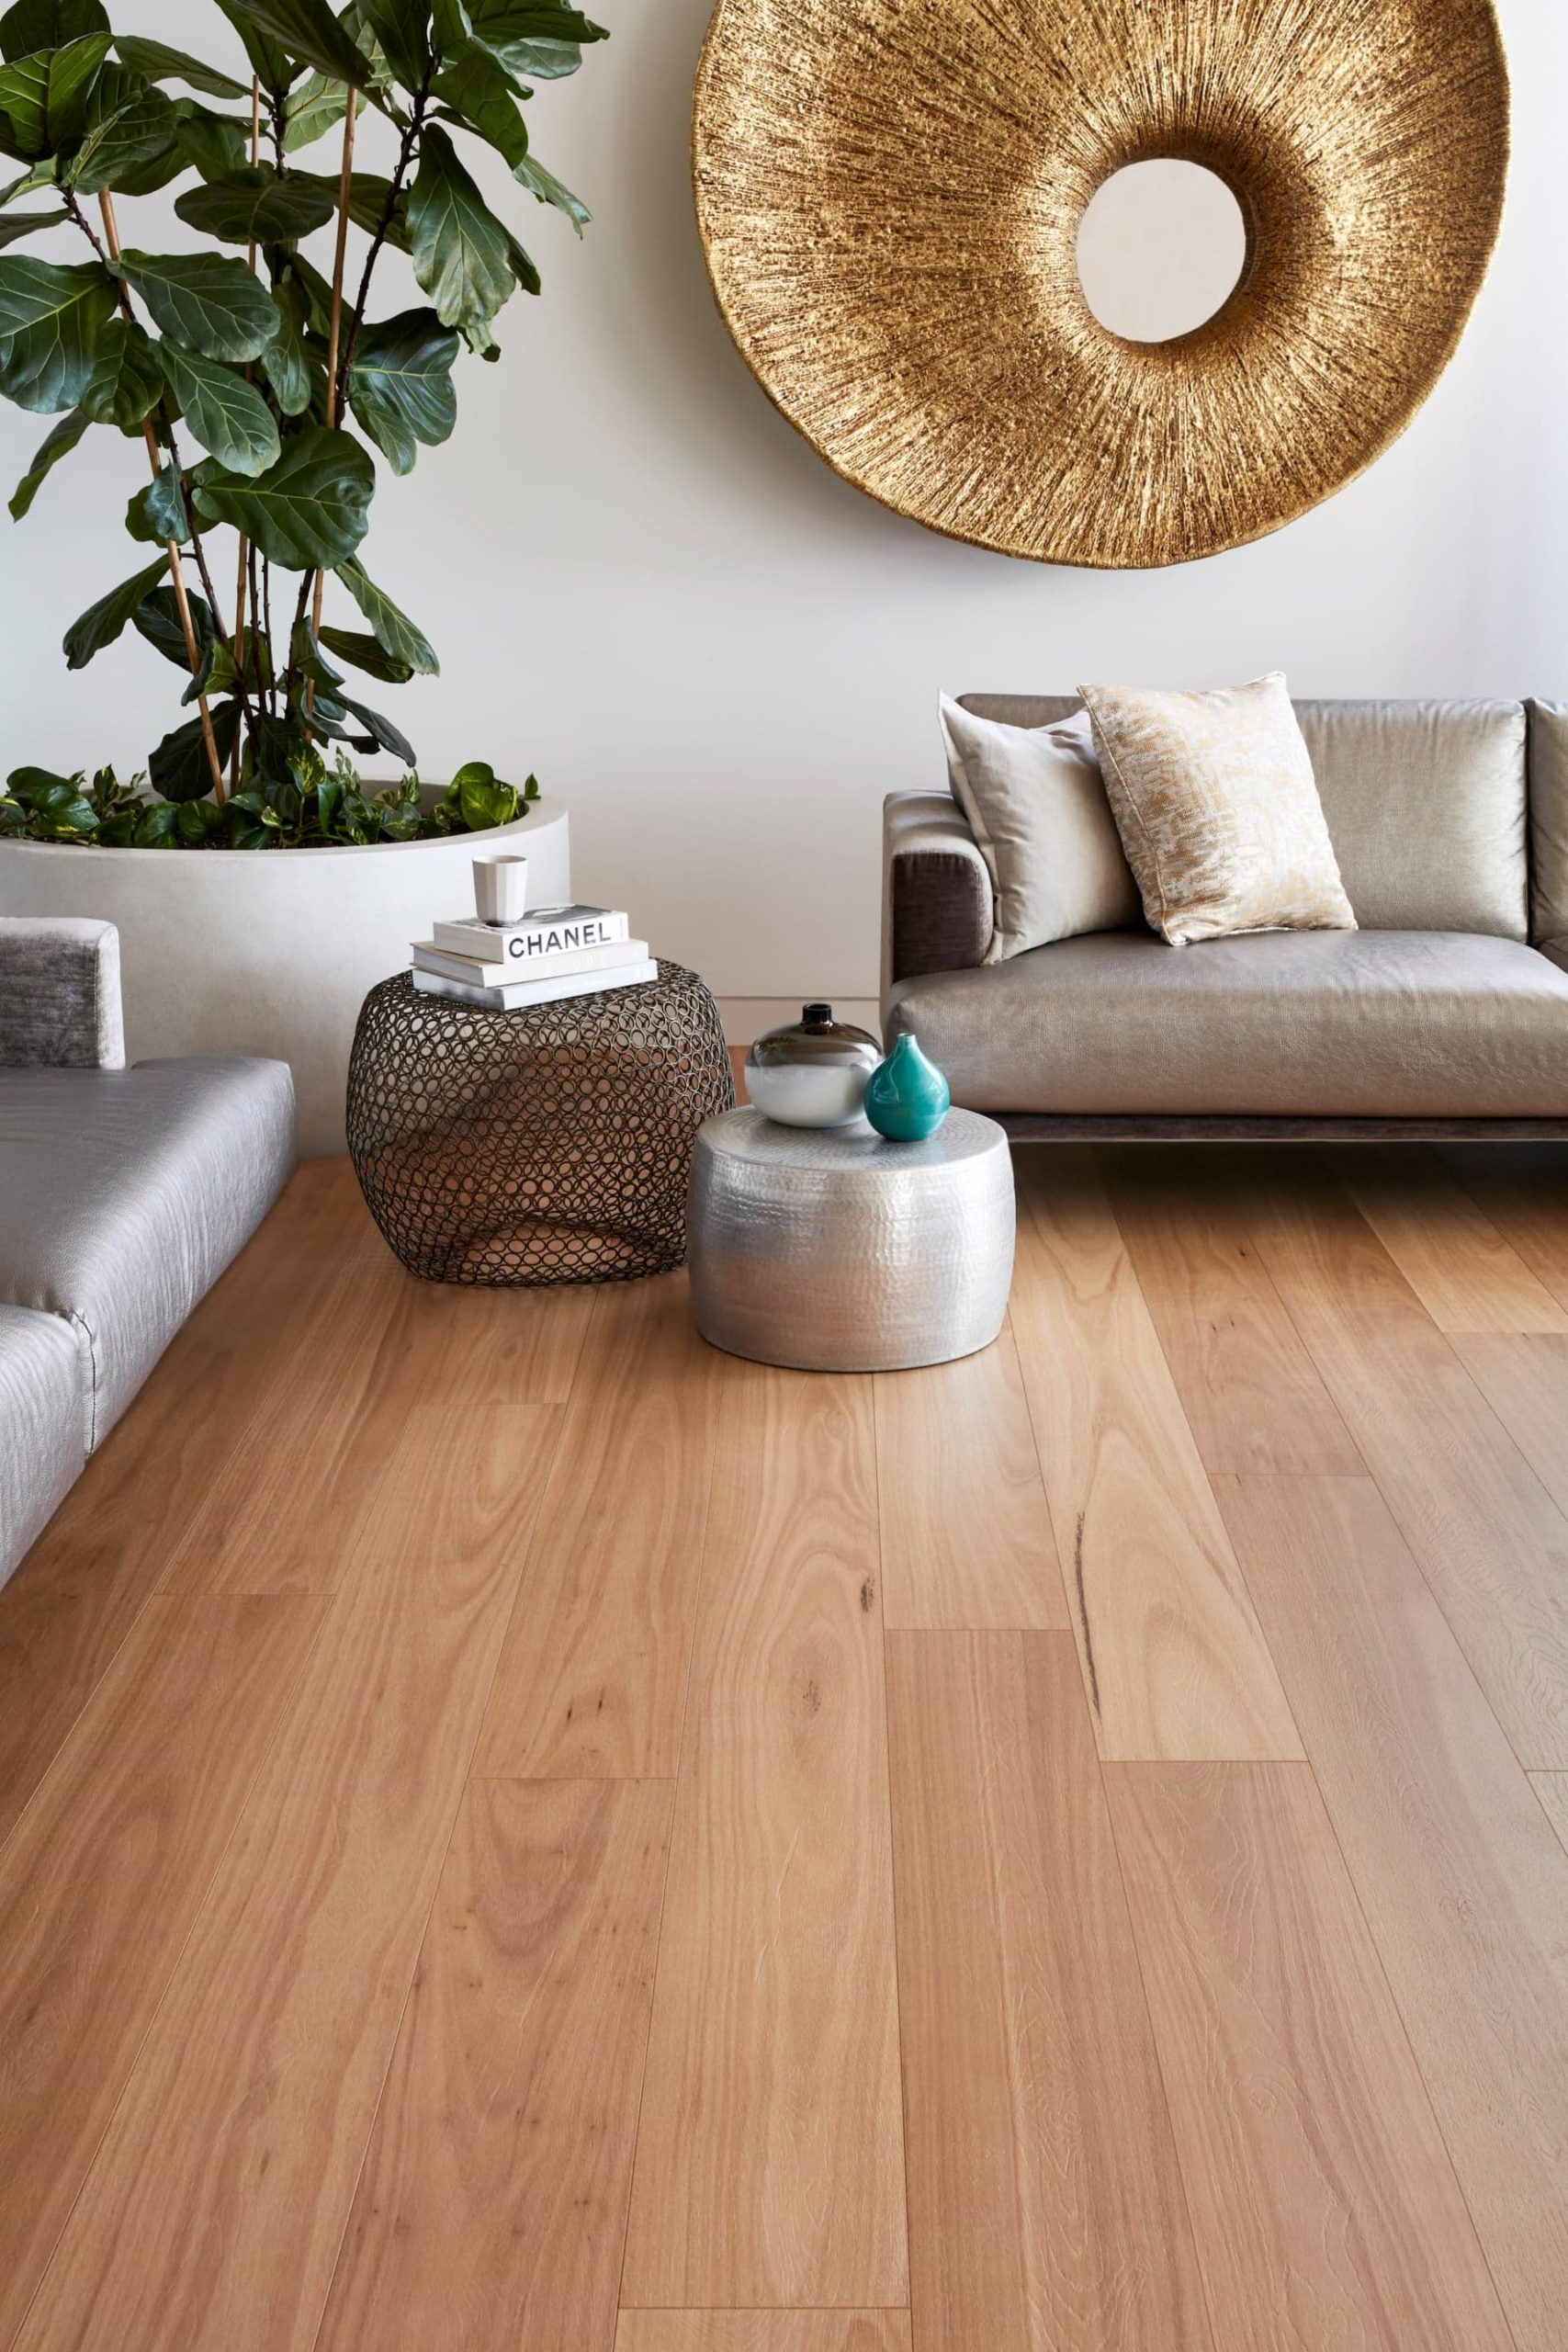
When you are ready to lay your floor, determine which way you want your floor to go. Usually, the floor will look best when laid perpendicular from the windows- the light will shine on the length of the board and all the colors and patters will be noticeable. When you remove the planks from the boxes, analyze each one. Some planks may work better as starter pieces, while others work better everywhere. Should you find several unacceptable planks, return them to your supplier and see what can be done to assist you with your situation.
When you take the necessary steps to prepare for the installation of laminate flooring, you will be successful. Make sure you have a separate area to make your cuts. You will be using a saw, therefore; a location outside or in the garage works perfect for this. The installation process is not complex, just a process that requires time and patience. Your patience may be tested, but you can really install laminate flooring yourself.
Many companies also offer training videos. If you are a visual person, these videos are well worth your time. The ClassenMegaloc quick laying system is one of the most user friendly laminate flooring you will find in the marketplace today. The planks are locked and then you listen for a “click.” Now, even you, the amateur, could listen for that click! There are no hammers or nails, just a simple lock and click system. You should follow all manufactur directions. You will have warranty coverage as long as you follow manufacture’s instruction. So be sure to read all instruction provided by manufacturer before laying, as different laminate may require different techniques.
Become an informed consumer before you dive right into the installation of your laminate flooring. Your room will “wow” you, upon completion. Laminate flooring will refresh and brighten your room im ways you never imagined. So, what are you waiting for? Check out the many styles, patterns, and colors here at Bexley Floors & Blinds, as you will find a look for your home. Once your laminate flooring is installed you will be asking yourself, “Why did I not tackle this project sooner?” You will be proud of the fact that you did install laminate flooring by yourself-well, almost!
Installing laminate flooring is truly one of the most consumer friendly DIY projects on the market today.
The supplies and materials which are needed to install laminate flooring are affordable; and the end result will provide you with years of enjoyment to come.
1. Measuring tape
2. Reversed jigsaw blade with teeth pointing down. Use an old 5 gallon bucket and cut the laminate flooring right over it, allowing the saw dust to fall into the bucket. Benefits when using reversed jigsaw blade: · No chipping on the top surface of the laminate flooring. · Saw dust is dropped straight into the bucket, no mess equals easy clean up. · Cheap- only $29.97 at Wal-Mart
3. Dry Erasable Marker. We like using a dark colored, dry erasable marker when installing laminate flooring. The marker is more visible than pencil, plus it’s easy to remove your mark if inaccurate measuring is to blame.
4. Undercut Saw – When installing laminate flooring it might be necessary to trim door jambs/trim so that the flooring will fit under the door. Don’t use caulk to hide your mistakes. Take your time to do it right! Cutting the trim and jamb can be done fast and easy by using an undercut saw with a rotary electric motor that drives a flat, circular saw blade in a horizontal setup. Hint: You can find a good quality undercutting saw in your local hardware store starting around $35.
5. Tapping Block and Pull Bar – Many laminate flooring brands come with easy locking systems where tapping is unnecessary or even not allowed. Sometimes in tight spots you may need one of these tools to properly install a plank without damaging it. For instance, when installing the last plank in a row you may need a pull bar to tap the plank safely and correctly into place. Using the pull bar in this case allows you to tap the board in without hitting the wall or damaging the board. Hint: Cut scrap pieces of laminate to use as spacers.
Laminate flooring is one of the most consumer friendly floors in the marketplace today. The three reasons that you should have laminate flooring in your home are: Easy to maintain, Cost Effectiveness and Your health. These three reasons combined make laminate flooring desirable to homeowners all around the world. If you decided to install your floor by yourself and in order to ensure that you will enjoy years of pleasurable use, please go through this DIY friendly checklist prior laminate flooring installation.
Unfortunately, warranty claims against flooring products usually turn out to be caused by wrong floor installation, rather than faulty material. You will have manufacturer warranty coverage as long as you follow manufacture’s instruction. So be sure to read all instruction provided by manufacturer before installing, as different laminate may require different techniques.
Step 1:
Check laminate planks before installation
Before stating installation check the flooring materials to ensure they are correct pattern, style and color. Inspect all laminate planks for visible defects. Wipe planks with soft cloth before installation.
Packaging of laminate flooring is design to be protected from forklift and other traffic that can damage carton corners. Pay closer attention to laminate that was in the box with visible box damage.
Do not install damaged laminate planks! All manufacturers will not pay labor charges or replacement on claims filed for materials installed with obvious visible defects.
If you discovered problem after opening 3 boxes of laminate, do not proceed with installation and contact your material provider for assistance.
Step 2:
A little bit of training is good for you
Plan everything before you start and have all necessary tools and accessories including proper underlayment, transitions, moldings, glue before you start
Be sure to have a thorough understanding of the scope of the project and the expectations of time of completion before starting laminate flooring installation.
Use all training resources available. Most of the manufacturers have on their website detailed instructions and/or videos how to install laminate flooring. Use it- it’s FREE.
Step 3:
Subfloor must be checked prior to installation
Make sure the subfloor is dry, level and in good repair
Clear all loose debris and dirt before laying the foam underlayment
Nail or screw loose areas that squeak and replace damaged areas that are loose or have been damaged by moisture.
Vapor Barrier underlayment must be used when installing laminate floors over below- or on-grade concrete sub-floor.
Step 4:
Acclimation
Store flooring horizontally in the original, unopened package.Floor must be conditioned for at least 48 hours. Do not open boxes until time of installation, atmospheric conditions may permanently alter the product, making it difficult to install
Cross stack the unopened boxes in the room where the floor is to be installed.
Maintain temperature and humidity at your job site. Keep temperature of minimum of 65 degrees Fahrenheit and humidity should net exceed 65%. It is important to maintain it 48 hours before and after installation.
Step 5:
Radiant heat
Radiant heat must be operating for a minimum of three weeks prior to the installation of laminate flooring.
Heating system should be turned off at the time of installation or if in winter should be set at exactly 65 degrees Fahrenheit for a minimum of 48 hours prior the installation.
After floor installation the operating temperature can be increased by a maximum of 5 degrees Fahrenheit in a 24-hour period.
Maximum allowable surface temperature for laminate floors is 80 degrees Fahrenheit.
Be sure to install vapor underlayment.
Step 6:
Underlayment
Laminate flooring requires an underlayment to be installed prior to the floor covering installation.
Use regular underlayment when installing your laminate over wood sub-floor.
Use vapor underlayment for: wood subfloor over crawl space, in manufactured houses, vinyl installed over concrete, cement subflloor, ceramic tile installed over cement subfloor, radiant floor We carry 3mm thick universal 2 in1 laminate flooring underlayment., this is regular underlayment with vapor film attached to it. Be sure to tape together the seams of your underlayment as you are laying it.
For impact sound and thermal insulation, please use underlayment such Harmony Silent Underlayment with sound reduction design. This underlayment is good for any type of subfloor.
Step 7:
Expansion joints
Laminate flooring is designed to be installed as a “floating floor”– thus it is not nailed or glued to the sub-floor and works as one big “pancake” that expands and contract with temperature/humidity changes.
Be sure to leave at least ¼” expansion gap around the perimeter of the floor, and around any stationary objects such as pipes, columns, build in cabinets. Failure to meet this requirement can result in the flooring buckling.
Areas grater than 30’ in width or 60 in length (example: one room; two or more rooms with adjoining hallway greater than 4’) must have a T-molding installed across the width of the room to provide additional expansion space. Don’t forget to leave expansion gap when installing your moldings as well.
Never fasten your wall base or q-round moldings to the laminate flooring using nails or screws. Nail them to the wall not to your floor!
If you have super heavy furniture (grand piano or pool table etc), use custom made “coasters” to evenly distribute the weight over big area.
Step 8:
Take your time to do the final touch!
Undercut door jambs and plan how to finish areas around pipes, posts or pillars to have polished look!
Do not use calk to hide your mistakes. Take your time to do it right!
Use color coordinated transition moldings to give a beautiful finished appearance.
Step 9:
Final advice
Never cut your laminate in the room where you install laminate flooring. When small particles of wood dust get stuck in the laminate flooring locking system you may have problem to lock planks together.
Most manufacturers have very detailed installation instructions on their web site. Take advantage of it and check it out before installation. It’s FREE. However, if for some reason in any stage of installation you have doubt in your ability to successfully finish it, hire professional installer who is BBB listed , insured and can give you at least one recommendation. Don’t be shy to call their customer to check quality of his work.
When you purchase your laminate flooring, make sure you also purchase any thresholds, quarter round and base molding at the same time. This will save you time and money. Remember, laminate flooring comes in an array of colors and will meet your decorating needs. The durability and strength that laminate flooring offers is something you will appreciate for years to come.These are just some very basic tips, in regards to installing laminate flooring. You can visit bexleyfloorsandblinds.com.au for an extensive list of what you need to know before you install laminate floor.
We want you to be happy with your new laminate flooring. If you decided to install your floor by yourself and in order to ensure that you will enjoy years of pleasurable use, please go through this brief checklist prior installation. You have to know that warranty claims against flooring products usually turn out to be damage caused by wrong installation, rather than faulty material. You will have manufacturer warranty coverage as long as you follow manufacture’s instruction. So be sure to read all instructions provided by manufacturer before laying, as different laminate may require different techniques.
– Subfloor must be checked prior to installation – Make sure the subfloor is level and in good repair – Clear all loose debris and dirt before laying the foam underlayment – Structurally Sound – nail or screw loose areas that squeak and replace damaged areas that are loose or have been damaged by moisture. – Dry- check moisture in the subfloor using a moisture meter 12% or less. – Acceptable common subfloors: exterior grade plywood, OSB board, concrete slab, existing wood (not adhered to the concrete), vinyl, Ceramic floor, terrazzo, particle board – Non-Acceptable subfloors: carpet, cushioned floors, perimeter glued vinyl. – Acclimation-before you start laying your floor must be conditioned for at least 48 hours. – Cross stack the unopened boxes in the room where the floor is to be installed. – Heating/ air conditioning must be on and set at minimum of 60 degrees Fahrenheit. – Radiant heat -radiant heat must be operating for a minimum of three weeks prior to the installation of laminate flooring. – Heating system should be turned off at the time of installation or if in winter should be set at exactly 65 degrees Fahrenheit for a minimum of 48 hours prior the installation. – After floor installation the operating temperature can be increased by a maximum of 5 degrees Fahrenheit in a 24-hour period. – Maximum allowable surface temperature for laminate floors is 80 degrees Fahrenheit. – Be sure to install vapor underlayment. – Underlayment- laminate flooring requires an underlayment to be installed prior to the floor covering installation. – Use regular underlayment for wood subfloor. – Use vapor underlayment for: wood subfloor over crawl space, in manufactured houses, vinyl installed over concrete, cement subflloor, ceramic tile installed over cement subfloor, radiant floor We carry 3mm thick universal 2 in1 laminate flooring underlayment., this is regular underlayment with vapor film attached to it. Be sure to tape together the seams of your underlayment as you are laying it. – For impact sound and thermal insulation, please use underlayment such Harmony Silent Underlayment with sound reduction design. This underlayment is good for any type of subfloor. – Expansion joints- be sure to leave expansion gap around the perimeter of the floor, and around any stationary objects such as pipes, columns, build in cabinets. – Expansion joint requirement vary depending on the type of laminate flooring product you are installing, but it must be minimum of 3/8″ – In most cases you don’t need expansion joint in a single room up to 30 linear feet or/and 1,000 square feet. – Leave expansion gap installing transition moldings as well. Check laminate boards before installation. – Examine the quality of each laminate board before installation. Put damaged pieces on side , sometimes you can use them as “starters”. – If after opening 3 boxes you have more faulty material, contact seller before opening next box.
Final advice Most manufacturers have very detailed installation instructions on their web site. Take advantage of it and check it out before installation. It’s FREE. However, if for some reason in any stage of installation you have doubt in your ability to successfully finish it, hire a professional installer who is BBB listed , insured and can give you at least one recommendation. Don’t be shy to call his customer to check quality of his work. You can always count on our technical support. We are authorized distributor of the top quality laminate flooring and our well trained
You have purchased laminate flooring and are ready to install your beautiful new laminate floor. Before you begin to install your laminate flooring, you will want to review the following basic laminate flooring installation tips.
Laminate flooring will be a permanent fixture in your home; as it is not something that is changed on a regular basis. Therefore, know the basics before you begin installing your laminate flooring. Use our installation tips to avoid potential problems with your floor.
DO
Be sure to read instructions provided by manufacturer
Let the floor to acclimate to room temperature for at least 48 hours before installing
Make sure your subfloor is prepared well and is level, clean and in good repair
Use proper laminate underlayment, use vapor barrier for concrete floors, ceramic tile, heated floors.
Tape together the seams of your underlayment as you are laying it
Always leave at least 3/8″ expansion gap around perimeter of the floor and around any stationary objects such as pipes, columns, build in cabinets, etc. Stagger rows one plank width from each other
Use Universal Installation Kit to help tighten joints, speed up installation, and keep same expansion gap size – don’t over-tap-you can damage the grooves.
DON’T
Install laminate on any floor with a drain
Continue laminate through doorways under 48″- use a transition
Install over carpet
Install double layer of laminate underlayment- too much cushion underneath will cause planks to separate
Run your laminate floor lengthwise over 30 linear feet- a transition strip must be used to continue.
Nail wall base molding or quarter round to the floor- always fix it to the wall with room underneath for the floor to expand and contract
Cut into back of the laminate, as this will cause chipping in the decorative top layer. Always be sure to cut into this layer.
When you purchase your laminate flooring, make sure you also purchase any thresholds, quarter round and base molding at the same time. This will save you time and money. Remember, laminate flooring comes in an array of colors and will meet your decorating needs. The durability and strength that laminate flooring offers is something you will appreciate for years to come.These are just some very basic tips, in regards to installing laminate flooring. You can visit bexleyfloorsandblinds.com.au for an extensive list of what you need to know before you install laminate floor.
Become an informed consumer before you dive right into the installation of your laminate flooring. When you take the necessary steps to prepare for the installation of laminate flooring, you will be successful. The installation process is not complex, just a process that requires time and patience. Your patience may be tested, but you can really install laminate flooring yourself. And take advantage of our list of 11 biggest laminate installation mistakes to be even more educated.
1. Not sealing laminate joints in water sensitive areas Laminate flooring products are recommended for residential areas such as kitchens, living rooms, dining rooms and bathrooms however following special installation instructions are required when installing laminate flooring in wet areas. In most cases laminate flooring surface is resistant to water, however, it is very important to prevent water or moisture from getting under the floor. All ”wet” areas MUST be sealed with Laminate Flooring sealant or 100% mildew -resistant silicone to avoid moisture damage and buckling.
2. Using the caulk around door jambs, pipes, and stonework take your time to finish your work the right way. Undercut doorjambs, trim properly to have nice and polished look.
3. Continue multiple room installation without dilatations Smaller rooms like 10’ x 10’ bedroom will be fine with ¼” of expansion gap around the perimeter of the floor. For bigger spaces, above 40’ in length ½” clearance is a must to avoid buckling.
4. Nailing wall base and/or q-round through the laminate Never nail your moldings to the floor. Right expansion gap is necessary so your laminate flooring can freely expand and shrink during the seasons. By pinching your moldings to your floor you are blocking free expansion of your floor and the final effect of this mistake will be buckled floor.
5. Tapping laminate All new generation laminates are constructed to “click” together. There is not need –unless directed in installation instruction to use tapping block. By hammering planks together you will damage locking system and your floor will not lock properly.
6. Installing laminate under kitchen cabinets Right expansion gap is necessary to avoid buckling of the floor. During winter and summer your floor will expand and shrink. By pinching your floor with cabinet you are blocking free expansion of your floor and the final effect of this mistake will be big bump on your floor.
7. Unintentional installation of wrong or defective laminate planks One of the firs tasks you should do before installing your new laminate flooring is to inspect all laminate planks to ensure they are correct pattern, style and color and are free from visible defects. Once wrong or damaged laminate is installed it is difficult to replace it. All manufacturers of laminate flooring will not pay labor charges or replacement on claims filed for materials installed with obvious visible defects. If you discovered problem after opening 3 boxes of laminate, do not proceed with installation and contact your material provider for assistance.
8. Not enough clearance around perimeter of the room Very common installation mistake. Laminate flooring is designed to be installed as “floated floor”– thus it is not nailed or glued to the sub-floor and works as one big “pancake” that expands and contract with temperature/humidity changes. Smaller rooms like 10’ x 10’ bedroom will be fine with ¼” of expansion gap around the perimeter of the floor. For bigger spaces, above 40’ in length ½” clearance is a must. Clearance issue is also very important around the door jambs, pipes, transition moldings etc. Failure to meet this requirement can result in the floor buckling.
9. Lack of thermal acclimatization When this simple step is skipped you can expect big “bump” in the middle of your room and be forced to reinstall your floor again. Laminate flooring like any other wood floor expands and shrinks, adjusting to the environment. For example, bringing cold laminate to warm room and installing it right away, even you will leave recommended expansion gap will be not enough to avoid buckling. It is very important to maintain temperature and humidity at your job site. Keep temperature of minimum of 65 degrees Fahrenheit and humidity should net exceed 65%. It is important to maintain it 48 hours before and after installation.
10. Installing on uneven sub-floor The quality of your sub-floor plays very important role in laminate flooring performance. Many older houses have imperfect sub-floor and installing too thick laminate will be just wrong decision. What will happen? Your laminate floor will flex up and down, adjusting to your uneven sub-floor, and the end effect will be damaged locking system, micro-gaps between boards and poor floor performance. Ideal situation is when you can check your sub-floor quality before laminate flooring purchase and then make adequate decision. Installing thicker laminate will add value and durability but what is most important it will add strength to the locking system. But if your sub-floor has major problems, do not expect that underlayment and 10mm thick laminate will take care of it. Unfortunately you have to fix your sub-floor first to fully enjoy your new floor investment.
11. Wrong underlayment choice Laminate flooring requires an underlayment to be installed prior to the floor covering installation. This is mostly to help your floor to “float” as well as protect your floor against noises when walking on it. There are several underlayment choices on the market, but the most important thing you should now is to install vapor barrier underlayment when installing laminate flooring over concrete sub-floor as well as over crawl space, in manufactured houses, vinyl installed over concrete, ceramic tile installed over cement sub-floor, radiant floor. The reason for it is simple, like any wood product, laminate flooring should be protected against moisture exposure. Vapor barrier underlayment will protect your floor against normal water vapor that is emitted through concrete. When installing it remember to overlap each row of vapor barrier laminate and add 8”overlap at seams, installed up to the edge of the wall base or wall. Many 2in1 vapor underlayments come with ready “overlap” section to make underlayment installation easier. If you have laminate with pad attached use just 6mil PE film often called Moisturebloc.
Q: What tools do I need to install this floor? A: You will want to have the following tools handy: a hammer; a tapping block and pull-bar; tape measure; masking tape; laminate glue; a drill for installing transition strips; table saw; jigsaw. While these tools are not always necessary, you may run into situations where you will need to use them.
Q: Can laminate flooring be installed in basements? A: Yes, laminate flooring can be installed in basement. Follow the appropriate underlayment selection- vapor underlayment is needed for all over cement subfloor installations. Do not install on any floor with a drain and make sure you subfloor is level.
Q: How long do I have to let the floor acclimate? A: The recommended time for acclimation is 24 hours. In colder months, you will want to extend this time to 36-48 hours. Be sure that while this process is taking place, you have the room temperature set above 65°F with a relative humidity of 75%.
Q: How can I protect my floor in heavier traffic areas, such as in front of the door or in the kitchen? A: Even though most laminates today are glue-less, that does not mean that you can not glue them. Areas such as these can be protected much more effectively using laminate glue in the seams- especially where water damage could be a problem (such as in front of a sink or dishwasher). For foyers and entryways, it is best to lay down a rubber-backed mat to collect dirt and mud from people entering/exiting the area.
Q: Do I have to remove my current floor? A: Laminate flooring is a floating floor system- meaning it is designed to cover any floor surface without being fixed to it. This makes it possible to cover almost anything- from linoleum to vinyl, ceramic to hardwood, and of course concrete and plywood sub-floors. Carpet is the only exception; while it is possible to install laminate over industrial carpet, any other type must be removed along with the padding underneath.
Q: What is the underlayment- is it necessary? A: The foam underlayment is essential to the bow and flex of the laminate. Being a wood product, it will expand and contract with the climate of the room- and the foam allows it to do this without any friction between the laminate and the floor underneath it. The only situation in which you would not need the underlayment is if you are installing the laminate over industrial carpet. For installation over concrete, you must first put down a plastic vapor barrier before laying the foam.
Q: Can laminate flooring be installed in bathrooms and/or laundry room? A: Yes, however you have to follow “wet area” installation rules. You need to seal the floor on the perimeter of the room and add a bead of glue to the tongue on the planks to be used in the areas subject to have spills. You should be aware that many warranties that come with laminate flooring do not include areas with a high moisture content- check if your flooring brand is allowed to be installed in wet areas.
Q: Can laminate flooring be installed on steps? A: Yes, laminate floor can be installed on steps, but the planks should be glued with regular wood glue. The moldings and transitions need to be nailed down.
Q: Do I have to glue or nail or staple anything? A: No. Most laminates are glue-less and click together. Since the laminate is a floating floor that expands and contracts, you do not want it fixed to the floor underneath it- which means that nailing and stapling are absolutely excluded from the installation process.
Q: What should I use to cut the floor? A: Any type of saw with a medium-coarse blade works fine for cutting laminate, however the best option is to use a table saw for all of your straight cuts, and a jigsaw where you need to cut around doorjambs and other obstacles. When cutting the laminate, it is very important that the teeth of the blade are cutting INTO the decorative surface of the laminate- this way all chipping takes place on the back side.
Q: I have a heated floor. Can I use laminate? A: Absolutely. Floors with radiant heat are no problem- you just want to be sure that the temperature is below 80°F at all times. Turn the heat down to 60°F one week before installation, so that the floor can properly acclimate to the room temperature. As with installing over concrete, a vapor barrier is required underneath your foam underlayment, to protect against humidity.
Q: What should I use to clean may laminate flooring? A: On daily basis vacuum, use a dust mop or wipe with a damp cloth . The best method is to sweep up the loose dirt, and then give it a once over with a dust mop . Laminates are made to be stain resistant- so cleaning is a breeze. If, however, you do get some stubborn dirt, you can use a DAMP sponge mop, with some dish-soap and hot water. Be sure to avoid over-saturating the mop, as too much water will cause damage to the laminate. Do not use soap based detergents or mop and shine products as they may leave a dull film on your floor. Do not use abrasive cleaners, steel wool or other products that can scratch your floor. Do not use wax or polish your floor! Use products designed to clean laminate flooring. Tough spots can be removed with nail polish remover or acetone.
Q: Can damaged laminate floor be repaired or replaced? A: Scratches and mini imperfections can be repaired using Wood Fill Kits. With serious damage replacement is the only option- call professional for help
Now you know we love to keep you in the loop when it comes to inspiring interior designs, tips like our blog on Child Safety and how to’s…but every now and then we’ve got to throw in some good ole’ nuts and bolts Blinds advice!
So the blinds in your living room are looking a little worn and dated. It’s time for a change. But you’ve not bought blinds in a while and you don’t really know where to turn…I know, what a crisis! Like with all things your first point of call is of course our pal Mr. Google…and if you search for blinds you’ll get 85 million results, give or take a few…errrr ‘what now?’ you ponder…
Don’t panic! We are here to help. If you don’t you know your Venetians from your Verticals or your Rollers from your Romans, this one stop handy guide will give you all the information you need. Now you can’t say fairer than that.
Honeycomb or Pleated Blinds
Pleated blinds are sleek and simple blinds that filter the light coming into your room beautifully, allowing you to experiment with different textures, shades and colours. They can be functional or decorative… You can use blackout pleated blinds underneath curtains for example or when using sheer fabrics. Pleated blinds can also offer excellent heat control and keep your energy bills down!
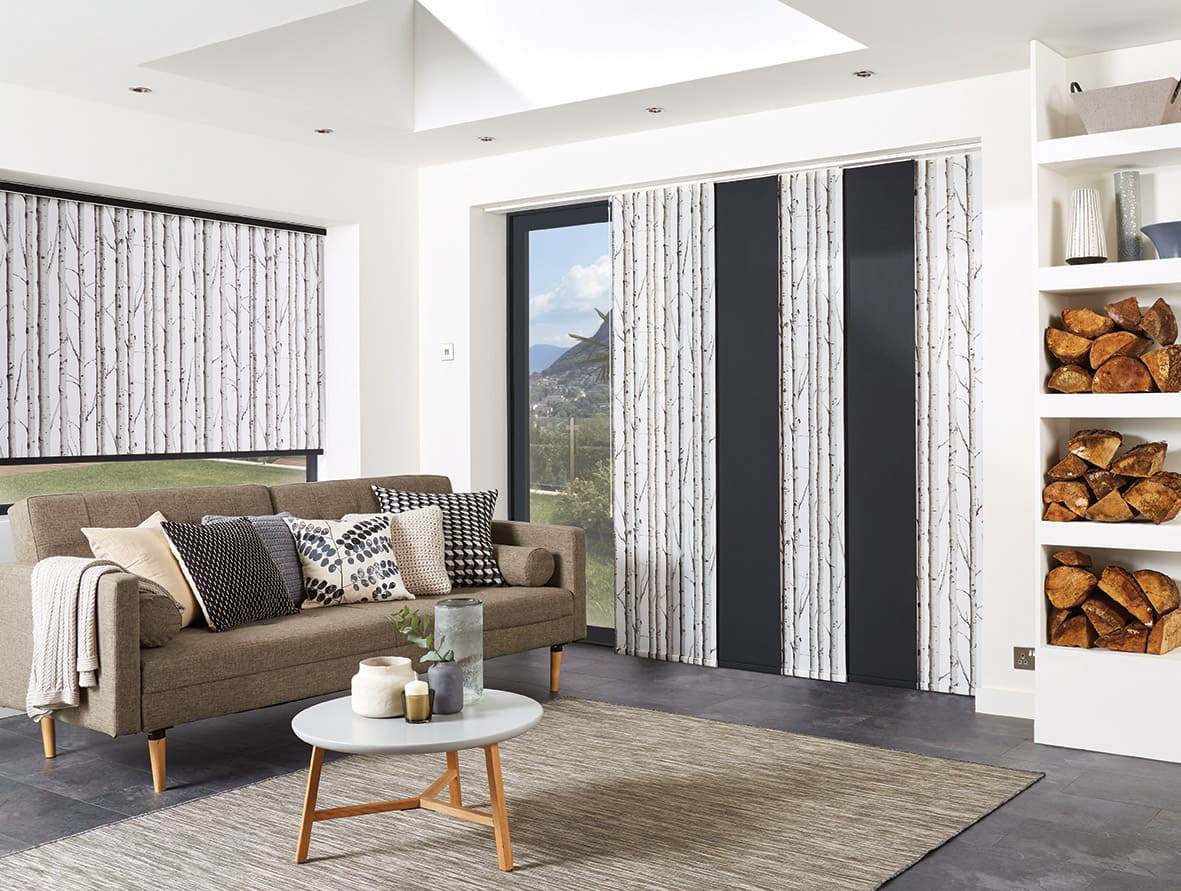
Panel Glide Blinds
Roller blinds are simple, elegant and versatile blinds. They are available in a range of fabrics and colours and can contribute strongly to the design of your room especially if you had a bold print in mind. Use a blockout fabric for complete privacy and room darkening or try a light filter for a natural diffused light, look.
If you still want to maintain your beautiful views or be able to see the kids in the garden, then consider a screen fabric. Screens can also be great at offering heat and UV protection and keeping glare off a computer screen!
Roller Blinds
Roller blinds are simple, elegant and versatile blinds. They are available in a range of fabrics and colours and can contribute strongly to the design of your room especially if you had a bold print in mind. Use a blockout fabric for complete privacy and room darkening or try a light filter for a natural diffused light, look.
If you still want to maintain your beautiful views or be able to see the kids in the garden, then consider a screen fabric. Screens can also be great at offering heat and UV protection and keeping glare off a computer screen!
Roman Blinds
Roman Blinds are made of softer fabric panels that fold neatly on top of one another when up, or in a horizontal panel formation when down. They can provide a classy, luxurious look and give you an opulent finish to your rooms. Get creative with some of the fantastic floral prints that are emerging from Europe at the moment for a sophisticated, contemporary look
Shutters
Interior plantation shutters provide a great all round solution. Not only do they look great but they are practical to! Made from PVC or Basswood they can be easily wiped clean and offer a great amount of privacy, ventilation and light control. Shutters are a current favourite in interior design as they can drastically change the look of a room and can even add value to your property. Shutters are a hard-wearing, popular investment in your home and compliment many styles from modern, clean, crisp looks, to Parisian chic to coastal inspired.
Venetian Blinds
Venetian blinds consist of horizontal slats suspended by a chorded ladder system. They are ideal for stylish, yet effective, window coverage and are made from timber, aluminium or faux wood. Select a material that suits your space – wood is great for hallways and living rooms but something easier to clean and water repellent would work better in your kitchen and bathroom.
Vertical Blinds
Vertical Blinds are made of vertical fabric, hanging slats attached to a runner at the top. They suit larger windows and sliding patio doors. Verticals are a durable, cost effective way to cover patio doors or larger openings. Traditionally fabrics have been very plain however in recent years floral patterns and textures have become available.
You would assume that all floating timbers are the same. It’s just wood, right? How could you go wrong?
The answer is plenty!
Setting aside the plethora of choices with type of wood, colour and price, there are other points to factor in before buying timber flooring.
Timber flooring is as an investment for your home and there is that expectation that timber floors will provide many years of reliable service.
When choosing which timber flooring to buy, customers need to take a number of criteria into account in order to get the best value in their timber floor.
1. What warranties are offered?
While most people understand the importance of warranties, some warranties come with exclusions that basically void the warranty should any problem occur. Customers should always get a copy of the Warranty Terms and Conditions and be aware of the product warranties that involve confusing terminology or technical jargon. Other warranties are conditional upon very strict and sometimes impractical maintenance regimes. In some instances, warranties are not even offered, or are only offered by overseas companies, not their Australian distributor. Do your research before purchase. The company offering the product warranty also needs to be reputable so if a claim needs to made, the company is still in business.
2. Is the product reputable?
At this point, customers need to ask questions, and lots of them.
• How long has the organisation been selling in the Australian market?
• May I look at a recent project using this product?
• Has the flooring won any awards or has the brand been featured in the media?
• Do you have any current testimonials from other customers who have this product?
Choosing an organisation which has been selling and installing timber flooring for a number of years reflects the brands strength and reliability.
3. How scratch resistant is the coat surface?
Finding out the number of coats and the quality of the coat is also important to know. The key is to look out for highly scratch resistant coatings. The resistance of a coating to fine scratches is often a good sign of how wear resistant the factory finish will be on your floor.
Conclusion
Remember timber comes from Mother Nature!
Timber is not water resistant and will expand when wet and contract when it dries out. Do not believe brands who claim otherwise. With a little research and lots of common sense, the timber flooring that has true value and longevity will be the product that shines!
Choosing the right laminate flooring for your home may seem a daunting task, especially with the suite of flooring available in the Australian market. Different textures, colours, grains, plank sizes and especially price points on offer may be challenges for many customers to absorb.
But the lure of laminate floor is obvious. Laminate floors combine the beauty and taste of timber floor with the practicality and durability of flooring technology.
Choosing the right laminate flooring should not be science but rather, a well-thought out decision that incorporates long term use and determining the true value of your laminate. It is that value for money which is the litmus test which is the most important.
SO WHAT ARE THE QUESTIONS CUSTOMERS SHOULD ASK?
1. What type of joining system is used?
Laminate flooring is layed floating, not glued, with an innovative, yet, simple click system, called joining system, which connects the boards to each other. Many customers would not have this on their radar but having the most superior joining system for their laminate is paramount. The best joining system in the world is the Uniclic system its easy to install and provides a gap-free finish after installation. Using glue to fix the flooring to the sub floor may not be as secure.
2. What warranties are offered?
Warranties are such an important part of the buying process and laminate is no exception. A 25-year warranty gives you peace of mind in the long term. While a 25-year warranty may give you peace of mind in the long term, unfortunately, many long warranties are handed out prolifically and often a lot of warranties are void by default to due to impossible environmental conditions such as moisture. At times, other warranties look OK, but there is no legitimate company to back them up – either the supplier does not look after complaints or the supplier has already left the flooring market after short term profit.
3. How moisture resistant is the product?
Moisture is the natural enemy of any laminate floor. In most cases, the moisture resistance of a laminate floor is determined by the quality and moisture resistance of the HDF core. The harder the HDF core, the higher the quality of the laminate flooring.
4. Is the product reputable?
Get an understanding on how long the laminate product has been sold in Australia and has been featured in magazines and online. Great reviews are another barometer to determine if the laminate is right for you. A reputable and long standing laminate company is much more enticing than a new company who may be a flash in a pan.
Conclusion
Customers need to look at the value of the laminate they are buying – value for money, quality, durability, longevity and beauty. Ticking those value boxes will help customers make the right decision. In short, look at the full package before making a purchasing decision. It is often the case that the price of a laminate floor reflects the quality.
If you’re looking to buy flooring for your home, you’ve come to the right spot! This article will take the stress (and endless research) out of finding your dream floor.
You’re building, renovating or perhaps simply revamping your home and you’ve reached that all important stage in the design process – choosing the flooring! Yep, it’s no exaggeration, flooring is a vital design element in any interior – it’s the first thing you see when you open the door, it’s one of the biggest surface areas in your home, and it can instantly set the mood and style of a room, not to mention add value to your property.
Now, if you’re reading this you’ve probably already narrowed down your options to timber flooring – the timeless, streamlined look and versatility a wooden floor brings to an interior is hard to beat, right? But the decision-making doesn’t stop there. Of course, appearance is a high priority when choosing flooring but so is practicality – if it doesn’t have the necessary qualities to suit your space and lifestyle it isn’t going to look good for long! There are heaps of factors to consider before you buy, from how much foot traffic the floor will get, comfort levels, humidity, size of your room, to the underlay and even the sound the timber floor makes. But do not fret over your flooring, this practical step-by-step guide is designed to help you through the tricky questions and arm you with the knowledge you need to make the right flooring choice for your home. So read on and get clued up on three of the most popular timber options – laminate, engineered timber flooring and bamboo.
WHAT IS LAMINATE FLOORING?
The science bit: a multi-layer synthetic flooring product made by laminating a digitally-printed image onto a glued high-density fibreboard (HDF). price: low range TOP 3 ADVANTAGES
• Scratch- and fade-resistant.
• Easy to keep clean. The sealed surface means dirt can’t accumulate. • Available in an extensive variety of designs and colours based on highly accurate representations of wood. WHAT IS ENGINEERED TIMBER FLOORING?
The science bit: Quick-Step engineered boards are made up of three layers of real wood with a strong protective finish. price: High range TOP 3 ADVANTAGES
• Natural timber look that brings warmth and authenticity to an interior. • Excellent stability and durability. • Pre-finished so no need for any messy sanding, varnishing, oiling, painting – it’s ready to install! WHAT IS BAMBOO FLOORING?
The science bit: strands of bamboo (a type of grass) woven and pressed into a solid product. price: mid range TOP 3 ADVANTAGES
• Extremely solid and durable. • Eco-friendly and natural. • The renewable raw material is harvested in managed forests. • A wood-like product for less.
Bexley Floors and Blinds has built its reputation on providing its customers with the highest quality workmanship available in the industry. Our installers are hand-picked based on dedication and experience and will take pride in every stage of the planning and installation of your new floor and blinds.
Our flooring and blinds installers are equipped with the finest tools available to ensure that our customers receive the quality installation they expect. We guarantee that your project will be completed properly and to your specifications, and provide a full warranty on all services.
Get the expert help you need. We know how much of an impact choosing flooring, blinds and doors can make on your space. The team at Bexley Floors & Blinds make it easy by providing a range of services and products for all residential and commercial properties in and around Sydney.
With many years of experience providing the region with high-quality flooring, blinds and door solutions, we know what you need. Talk to our professional staff and we’ll help you with every step from choosing to match a décor or colour scheme through to delivery and installation.